
Caribbean Butter Bread Recipe
Warm, soft, and buttery, this Caribbean butter bread recipe makes the loaf of your dreams. It’s sturdy enough for the perfect sandwich yet pillowy when eaten straight from the pan. Ready to break your “eat less flour” resolutions?
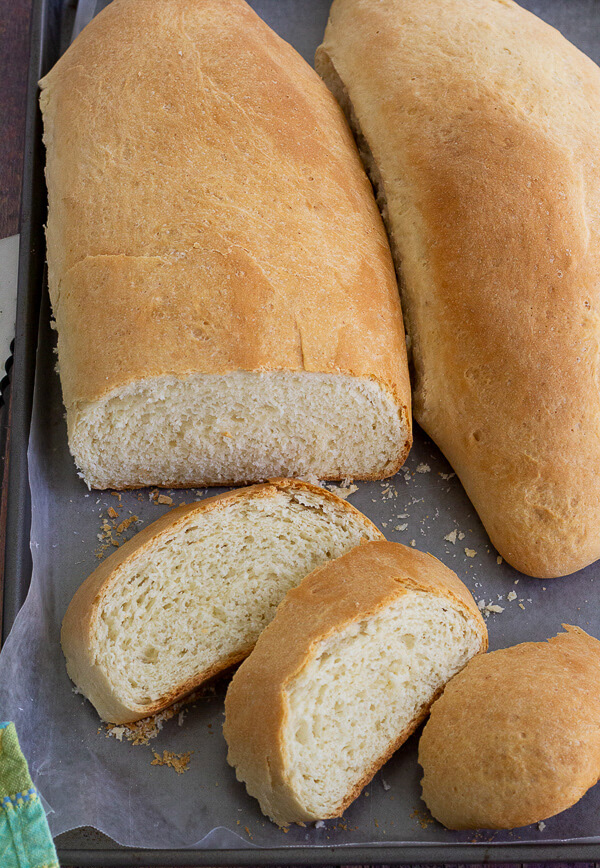
Every year, I swear I’m going to eat less flour. And every year, I break that promise, especially when it comes to sharing recipes like this.
I couldn’t keep this one from you. This homemade Caribbean butter bread deserves its flowers.
Bread baking is a big deal in the Caribbean. We don’t just bake—we share. It’s rarely just one loaf; it’s a tray full for neighbors, family, and that one friend who is always “just passing by.”
White bread is my weakness, and this butter bread? Right at the top of the list.
What is butter bread?
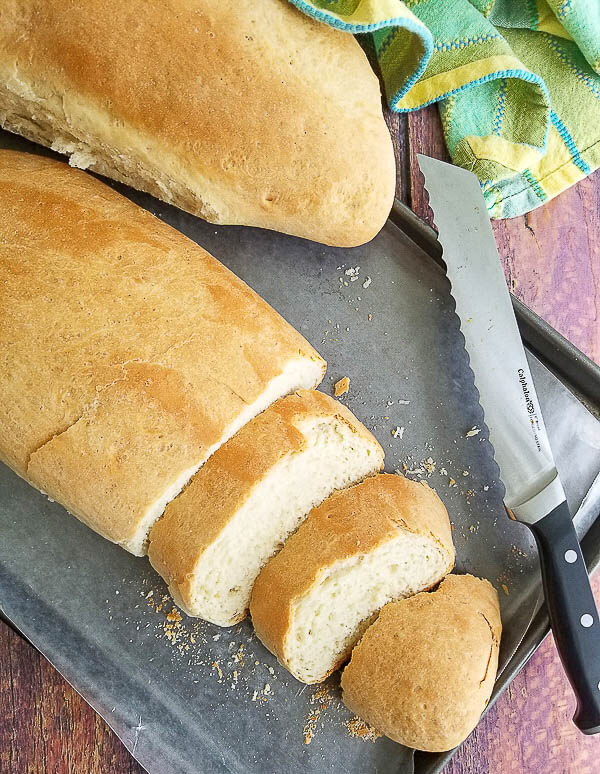
Caribbean butter bread is a soft, golden loaf that’s brushed with melted butter during the shaping process, giving it a rich, buttery flavor and a slightly crisp crust. The inside stays tender and smooth, perfect for slicing.
It’s a sandwich-style bread, similar in use to Jamaican hard dough bread, but we don’t bake this one in a loaf pan. Instead, it’s rolled and baked freeform on a tray, giving it that signature shape.
Growing up, butter bread was one of those breads we’d pick up from the bakery alongside hops bread and enjoy with butter, cheese, or a generous swipe of guava jam.
How to Make This Caribbean Butter Bread
Ingredients
You don’t need anything fancy to make this buttery loaf, just a few pantry staples. Here’s what goes into the dough:
- Flour, yeast, sugar & salt – The foundation of the dough. All-purpose flour keeps it soft, sugar helps feed the yeast, and salt balances the flavor.
- Butter & vegetable shortening – This combo gives the bread its richness and soft texture. You can use all butter if you don’t have shortening, though the texture may be slightly different.
- Whole milk & warm water – These bring moisture to the dough and help activate the yeast. You can swap in evaporated milk (diluted slightly with water) if that’s what you have on hand
You’ll also need extra melted butter for brushing the dough before rolling and again before baking. Don’t skip it, it’s what gives this bread its signature buttery layer.
Instructions
1. Make the dough
In a large mixing bowl (or the bowl of your stand mixer fitted with a dough hook), combine the flour, sugar, salt, and yeast.
Add in the softened shortening, warm water, and milk. Mix until a soft, smooth dough forms. If using a stand mixer, knead on moderate speed for about 2–3 minutes. If kneading by hand, knead for about 10–12 minutes, until the dough is soft and smooth.
Tip: Lightly oil your dough hook to help keep the dough from climbing up while kneading.
2. First rise
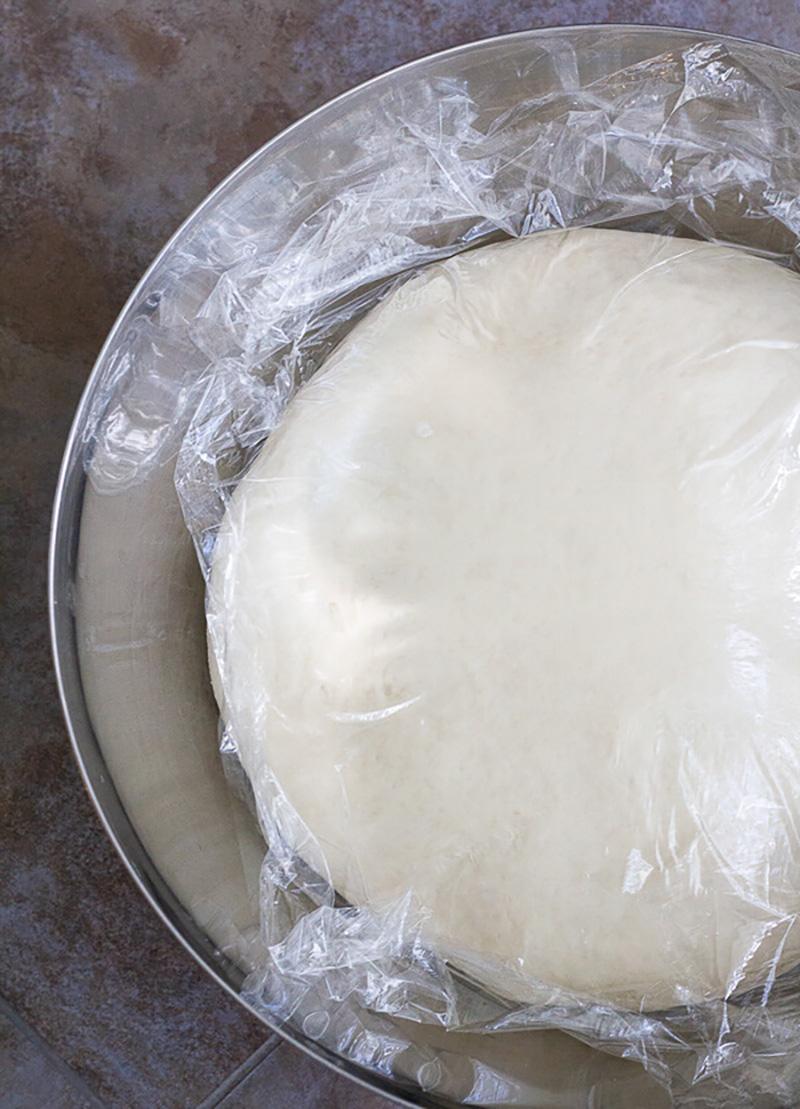
Cover the bowl with plastic wrap or a clean, damp towel. Let the dough rise in a warm place for about an hour, or until it has doubled in size.
3. Shape the dough
Once risen, punch down the dough and divide it into two equal parts.
On a lightly oiled surface (or silicone mat), roll each piece into a rough circle using a rolling pin. Don’t worry about making it perfect.
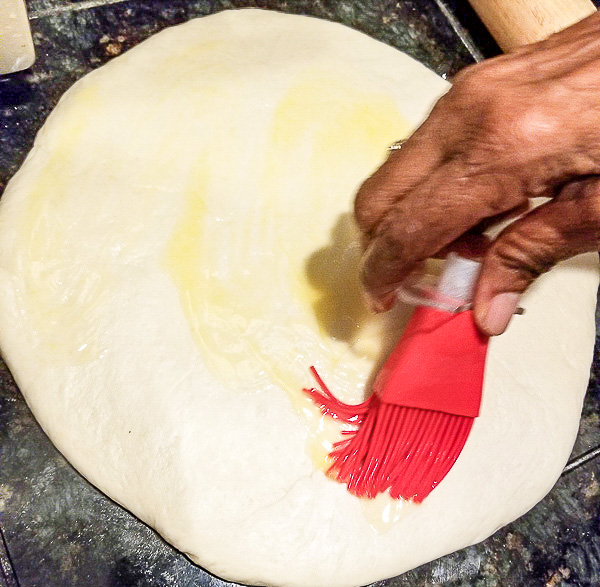
Brush the surface of the rolled dough with melted butter; don’t be shy with it.
4. Roll and rest
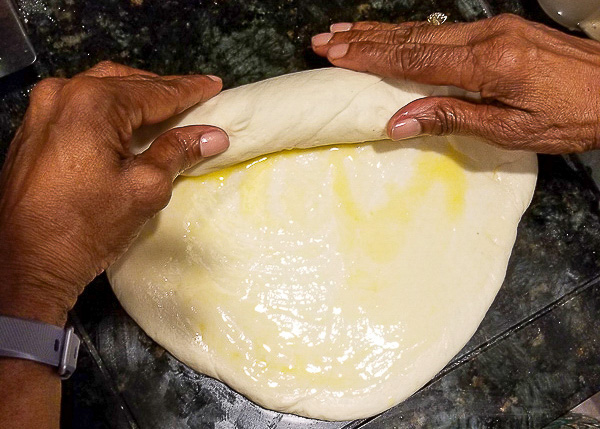
Starting at one edge, roll the dough up tightly into a log, jelly-roll style. If butter squeezes out, that’s totally fine.
Carefully transfer the rolled dough onto a parchment-lined baking sheet. Position the seam side down to prevent it from opening during baking.
Cover the loaves with a towel and let them rest for about 20 minutes while the oven preheats to 350°F (175°C).
5. Bake
Right before baking, brush the tops of the loaves with more melted butter.
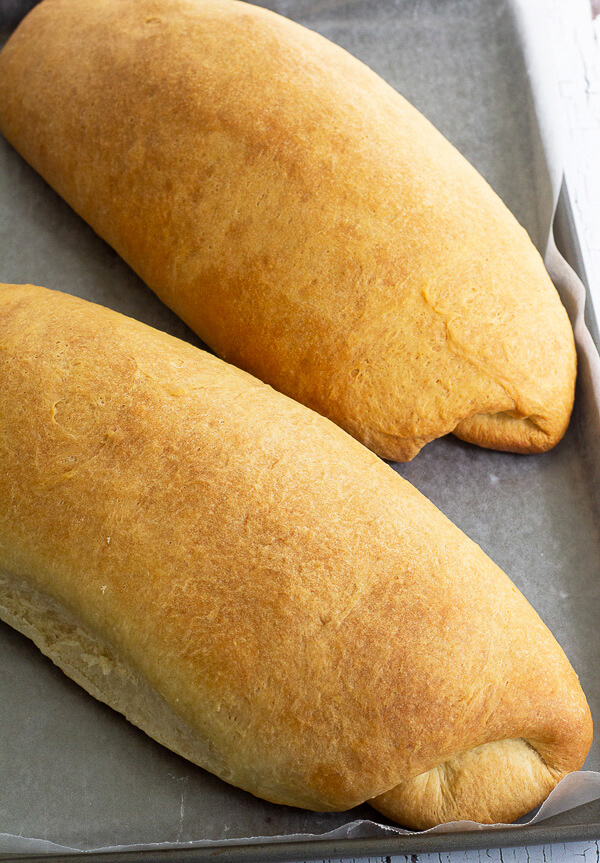
Bake for 20–25 minutes, or until the loaves are golden brown. Oven times may vary, so keep an eye on them. If you’re using an instant-read thermometer, the center should reach about 190–200°F.
Tips for baking bread
Here are some things I’ve learned (sometimes the hard way!) while getting this loaf just right:
- Pick the right yeast: You can use active dry or instant yeast. Instant yeast can be mixed right into the flour, while active dry yeast should be dissolved in the warm water first.
- Mind the water temp: Warm water helps activate the yeast, but if it’s too hot, it’ll kill it. I do the two-finger test: dip your fingers. If it’s too hot to hold them in, it’s too hot for your dough.
- Preheat your oven properly: Give your oven at least 20 minutes to heat up before baking. Bread likes a consistent, hot start.
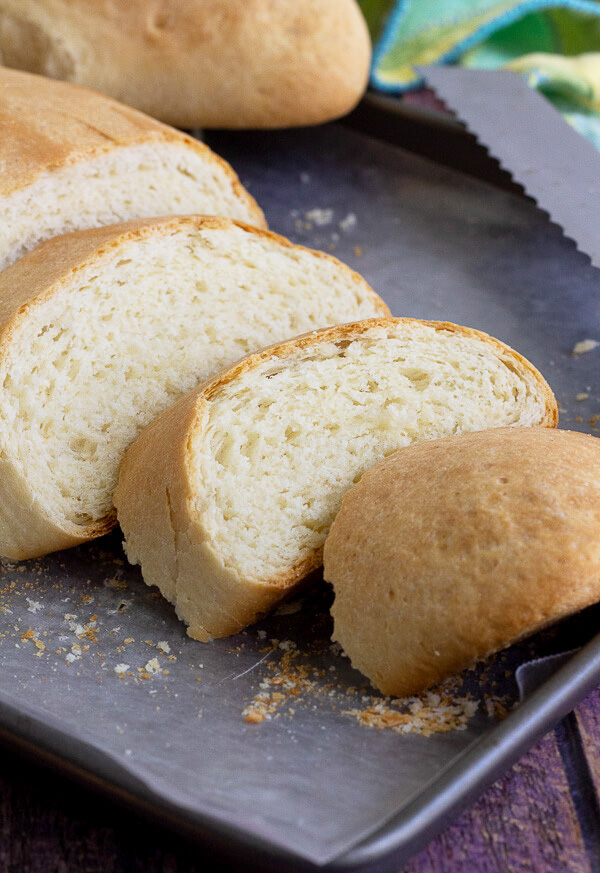
- Let the bread cool (even if it’s hard): I’m the first to admit I fail this one often—hot bread and cheese are a weakness. But letting the bread cool before slicing helps avoid cracks or squashed slices.
- If your bread turns out dense: Make sure your yeast is fresh and give the dough enough time to double in size during the first rise. A cool kitchen can slow things down, so go by how the dough looks rather than strictly by the clock.
Storage
After all that work, let’s make sure your bread stays fresh.
- Room temperature: Store your cooled loaf in a bread box or an airtight container. This helps maintain softness while preventing mold.
- Plastic wrap: You can also wrap the whole loaf or slices tightly in plastic wrap. Just know this might soften the crust a bit.
- Reheating: To soften day-old butter bread, warm individual slices briefly in the microwave or wrap the loaf in foil and warm it in a low oven. You can also toast slices if you prefer the edges a little crisp.
- Freezing: To keep bread fresh longer, slice it after it’s cooled and freeze the individual slices. Wrap them tightly and store in a freezer-safe bag. When you’re ready, just toast or warm up as needed—no need to defrost.
What to serve with butter bread?
This Caribbean butter bread shines on its own, but it’s even better with something to sop up. Pair a thick slice with:
- Stew oxtail – Rich and flavorful with that buttery bread? Yes please.
- Stew chicken wings – A Sunday classic that just makes sense.
- Guinness lamb stew – Deep flavor meets soft, golden bread.
- Steamed conch – A light but savory companion.
Frequently asked questions
The loaf should be golden brown and sound hollow when tapped on the bottom. If you’re unsure, check the center with an instant-read thermometer. It should be around 190–200°F.
This recipe is meant to be baked freeform on a baking sheet, but if you prefer a more structured shape, you can bake it in a greased loaf pan. Just expect a slightly different crust texture.
Yes! Using all butter will still give you a soft loaf, though it might be slightly less tender than the butter-shortening combo.
Absolutely. Slice it once cooled, wrap the slices tightly, and freeze. You can pop individual slices into the toaster or oven straight from the freezer.
Yes. Just dilute the evaporated milk with a bit of water to bring it closer to the texture of whole milk (about ¾ cup evaporated milk + ¼ cup water). It works great and still gives the bread a lovely richness.
More Caribbean bread recipes
If you’re in the mood to keep baking, here are a few more Caribbean bread recipes to try:
Recipe
Caribbean Butter Bread
Ingredients
Method
- Combine the flour, sugar, salt, and instant yeast. Add the shortening, warm milk, and warm water.
- Mix and knead until a soft, smooth dough forms, about 2–3 minutes in a stand mixer or 10–12 minutes by hand.
- Place the dough in a large bowl and cover with plastic wrap or a clean, damp towel. Let rise in a warm place for about 1 hour, or until doubled in size.
- Punch down the risen dough, then divide it into two equal pieces.
- Heat oven to 350 degrees
- On a lightly oiled surface, roll each piece of dough into a rough circle. It doesn’t need to be perfect.
- Brush each piece of rolled dough with 1 tablespoon of melted butter.
- Starting at one edge, slowly roll each piece of dough into a tight log. Some of the butter may gather at the end as you roll, and that’s fine.
- Place the loaves seam side down on a parchment-lined baking sheet.
- Cover the loaves with a clean towel and let them rise for about 20 minutes while the oven preheats to 350°F.
- Brush the tops of the loaves with the remaining melted butter.
- Bake for about 25 minutes, or until the loaves are golden brown and the center reaches 190–200°F.
Nutrition
Notes
Recipe Printed From ThisBagoGirl.com


I only have active dry yeast. How much of it should I use for this recipe?
As soon as I can get my hands on 8 cups of flour, I am definitely trying this recipe! I have just discovered your blog.
HI. Here is the conversion: To use active dry yeast instead of instant (bread machine) yeast in a recipe, multiply the amount of yeast by 1.25.
What type of flour is best? Bread flour or all purpose?
Hi. I used all purpose. It is the only flour I buy to be honest. Will update the post to be more specific. Thank you!!
Hi. I will try the recipe today. You mentioned by the ingredients 1/2 cup of vegetable shortening and 2 tbs of vegetable shortening but in the instructions you wrote shortening milk. So I am guessing the 1/2 cup is for the shortening milk. My question is though what can the shortening milk be replaced with? Thank you.
HI Sorry. I forgot a comma between shortening and milk. Edited. Sorry for the confusion.
I live in South Korea and just made this recipe and almost cried cause I was instantly transported to my childhood days living west in Fredericksted! Thank you for this recipe.
You are welcome!! Thanks for posting and stay safe!
You are welcome!! Thanks for posting and stay safe!
You are welcome!! Thanks for posting and stay safe!
The recipe calls for 1/2 cup of Vegetable shortening and 2 Tablespoon of Vegetable shortening. Do you add it all to the mixture or is the 2Tbsp used when rolling into a ball.
Hi, the 2 tablespoons is a little extra oil that is needed for the mixture.
Hi, is the vegetable shortening Crisco shortening?
Hi, is the vegetable shortening Crisco shortening?
What can I do to keep my bread bottoms from burning or getting to dark. Also any tips on how to make sure the bread is thoroughly cooked and avoid the bottoms from getting to dark. Should I bake at a lower temperature?
HI yes. Crisco is actually the brand I prefer to use also
Hey. Are you putting it on the lowest rack? It could be getting too much heat You can try to move it up a level. You oven temp could be really strong too so another option would be to lower the temperature a bit. You can also put a sheet pan on the lowest level between the heat and the bread and it will help reduce the intense heat to the bread.
Thank you very much. I use the middle rack. I will try and put a sheet pan on the bottom rack to help. That's a good idea. Thank you again.
The recipe calls for 1/2 cup of Vegetable shortening and 2 Tablespoon of Vegetable shortening and to add it all together to the flour mixture. I am using the 1/2 differently from the 2 tbsps?
The recipe calls for 1/2 cup of Vegetable shortening and 2 Tablespoon of Vegetable shortening and to add it all together to the flour mixture. I am using the 1/2 differently from the 2 tbsps?
Hi. yes it's a 1/2 cup plus the 2 tablespoons additional
Can I substitute butter for the shortening?
Hi. Yes you can.. 1 for 1. BUT.. know that the texture of the bread would be a bit different
I am so glad I came over from the Bloggers Group on Facebook. I have been looking for another sandwich bread recipe. The only thing I see different in your recipe and the two I make is you use solid shortening, and I use butter/oil. I can't wait to try your recipe and see the difference shortening makes.
Oh hey Lori. Does the butter/oil make much of a difference with bread texture?
I'm sorry, I don't combine the two. One recipe uses butter and the other uses oil. I like the one with butter better than I do the one with oil. I find the oil recipe to be a little more dense than the one with butter.
Glad to find this recipe. As a child on Aruba I used to get butter bread when I visited my godmother, but never knew how to make it.
Hi, would it be okay to let the dough do the first rise overnight in the fridge?
Hi Thoya. I have never done this myself, but my mom says yes you can. After mixing cover and put in fridge. You can punch down one hour in and then let it rise again for whenever you need to use it. It's best to use it in about 48 hours of mixing once it's in the fridge
It came out absolutely fabulous. Thankyou for your wonderful recipes.
Hi. I’m about to make this. It calls for vegetable shortening. Is that the same as vegetable oil
Hi. I use crisco. Sorry I'm late to see your comment.
Greatt.. thank you. Did you use the vegetable oil?
I made this today and it was delicious! Tastes just like home!
Great. Thanks for letting me know
I might just not be seeing it, but what temperature should I preheat the oven to?
Hey, It's line 5 in the recipe card. 350 degrees.
I don't have any shortening and can't get access to it for a few weeks. what can I substitute ?
Heya. Just use margarine. It just won't be as "crispy" crusted.
Hi! What size stand mixer would you recommend for mixing the 8 cups of flour?